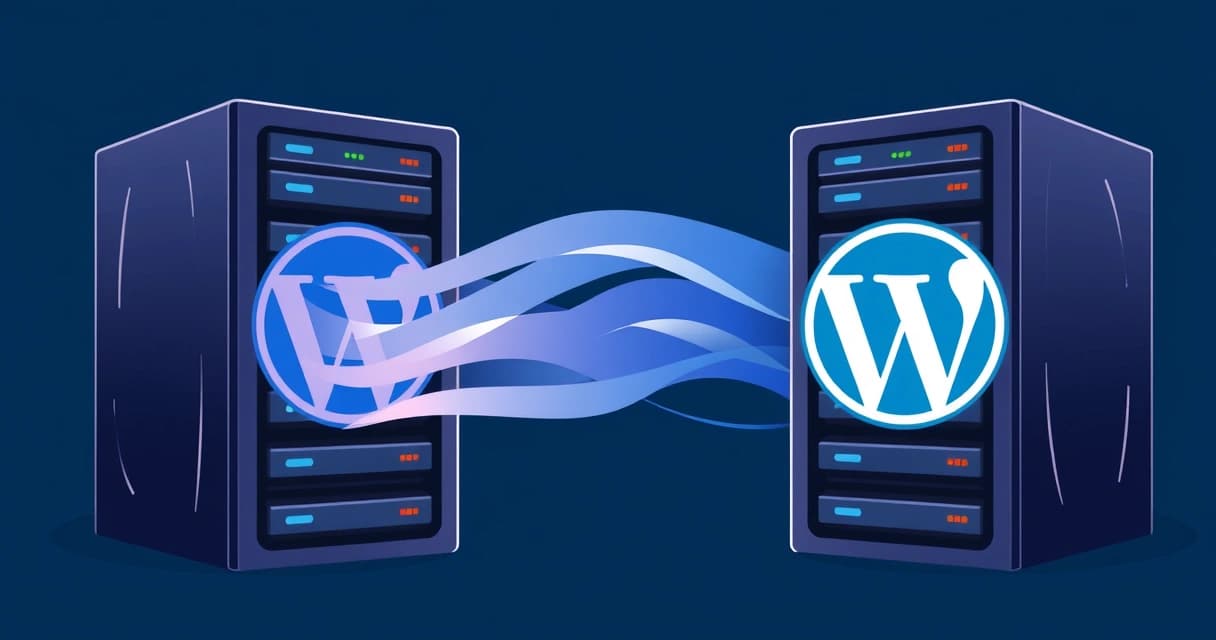
Migrating a WordPress website to a new server without incurring downtime is a critical task for maintaining continuous service and a positive user experience. The process involves carefully orchestrating file synchronization, database replication, and DNS updates to ensure that visitors always access a functional version of your site. This guide details a methodical approach, leveraging tools like rsync, mysqldump, and strategic DNS management, to achieve a near-zero downtime migration for your WordPress installation as of 2026-04.
Understanding the Zero-Downtime Migration Philosophy
Zero-downtime migration for WordPress signifies a transition where your website remains accessible and fully functional throughout the entire moving process. This means users never encounter maintenance pages, error messages, or outdated content. Achieving this requires a parallel setup: the old site continues serving traffic while the new site is prepared and tested independently. This strategy ensures redundancy and a seamless handover, preventing any service interruption that could impact SEO rankings or user trust.
The core principle relies on manipulating DNS (Domain Name System) records. Initially, your domain points to the old server's IP address. After the new server is fully configured, optimized, and thoroughly tested, DNS records are updated to point to the new IP address. The brief period during which DNS changes propagate globally is the only window of potential inconsistency. To minimize this, a low Time-To-Live (TTL) value for your DNS records is set beforehand. A TTL of 300 seconds (5 minutes), for example, instructs DNS resolvers to cache your domain's IP for only five minutes, accelerating the switch. High-traffic sites often employ more complex strategies like load balancing and database replication to eliminate even this minimal window, ensuring complete data consistency across both environments until the final cutover.
Pre-Migration Checklist: Preparing for a Smooth WordPress Transfer
A successful, downtime-free WordPress migration starts long before any files are moved. Thorough preparation ensures all prerequisites are met and potential issues are identified early. This systematic approach reduces risks, streamlines the entire process, and increases the likelihood of a flawless transition.
Choosing Your New Hosting Environment
Selecting the right new server is fundamental to your site's future performance and scalability. Consider factors like your current site's traffic volume, resource consumption, future growth projections, and budget. Options range from cost-effective shared hosting, which is suitable for smaller sites with predictable traffic, to powerful VPS (Virtual Private Server) or dedicated servers for high-traffic or resource-intensive applications like e-commerce or complex web applications. Managed WordPress hosting providers often simplify the migration process with built-in tools or dedicated support teams, handling many of the technical intricacies for you.
For many growing WordPress sites, a VPS offers a balanced solution, providing dedicated resources, root access, and often better performance isolation than shared hosting, without the high cost of a dedicated server. Providers such as Valebyte specialize in managed WordPress hosting, which can significantly ease the burden of server management, security updates, and migration tasks. A self-managed VPS allows for fine-tuned control over the entire environment, from specific PHP versions (e.g., PHP 8.2 or 8.3, both actively supported as of 2026-04) to web server configurations like Nginx or Apache, crucial for advanced performance optimization and custom setups.
Tip: Evaluate your current site's resource consumption (CPU usage, RAM utilization, disk I/O, database query times) using monitoring tools available through your existing host or server utilities likehtopandmysqltop. This data is invaluable for selecting a new hosting plan that adequately supports your WordPress installation's specific needs, preventing performance bottlenecks or resource starvation after migration.
For a deeper dive into hosting choices, consult our WordPress 6.x Performance: Managed Hosting vs. VPS Benchmarks for detailed insights into performance differences. If you're planning for significant traffic, our guide on VPS Requirements for a 50k Monthly Visit WordPress Site provides concrete specifications for resource planning.
Backing Up Your Existing WordPress Site
Before initiating any changes, perform a complete and verifiable backup of your current WordPress site. This includes all files (WordPress core, themes, plugins, uploads in wp-content/uploads) and the entire database. This comprehensive backup serves as your ultimate safety net, allowing you to revert to the original state if any unforeseen issues or data corruption arise during the migration. Popular WordPress backup plugins like Duplicator or UpdraftPlus offer automated solutions, while manual methods using rsync for files and mysqldump for the database provide granular control and are often preferred by experienced system administrators.
# Manual file backup using rsync (executed from your local machine or a backup server)
# Ensure SSH access is configured for user@old_server_ip
rsync -avz --exclude="wp-content/cache" --exclude="wp-content/backups" user@old_server_ip:/var/www/html/yourwordpresssite/ /path/to/local/backup/files/

# Manual database backup using mysqldump (executed on the old server)
mysqldump -u your_db_user -p your_db_name > /path/to/server/backup/your_db_name_backup_20260430.sql
# Then transfer this SQL file securely off-site, e.g., using scp
scp user@old_server_ip:/path/to/server/backup/your_db_name_backup_20260430.sql /path/to/local/backup/
Crucially, ensure your backups are stored securely off-site, separate from both your old and new hosting environments. Storing backups on the same server that might be affected by migration issues defeats the purpose. Cloud storage services (e.g., S3-compatible storage, Google Drive) or a dedicated remote backup server are excellent choices for redundancy. For more general guidance on WordPress migrations, refer to the official WordPress documentation on moving WordPress.
Setting Up the New Server Environment
Provision the new server with the necessary software stack to run WordPress efficiently. This typically includes a robust web server (Nginx 1.27, released August 2024, or Apache HTTP Server 2.4.x, both highly stable as of 2026-04), a compatible PHP runtime (PHP 8.1 or newer is strongly recommended for WordPress 6.x for performance and security), a MySQL-compatible database (MariaDB 10.11.x or MySQL 8.0.x are current and widely supported), and essential PHP extensions (e.g., php-mysql for database connectivity, php-gd for image manipulation, php-curl for external requests, php-xml, php-mbstring, php-zip). Install WP-CLI (WordPress Command Line Interface) for command-line management of WordPress, which proves invaluable for configuration updates and database operations during migration.
# Example for Ubuntu 24.04 LTS with Nginx and PHP-FPM
sudo apt update && sudo apt upgrade -y
sudo apt install nginx php8.2-fpm php8.2-mysql php8.2-gd php8.2-curl php8.2-xml php8.2-mbstring php8.2-zip mariadb-server curl git unzip -y

# Configure Nginx server block for your domain (example, adapt as needed)
sudo nano /etc/nginx/sites-available/yourdomain.com
# --- Start Nginx config ---
server {
    listen 80;
    listen [::]:80;
    server_name yourdomain.com www.yourdomain.com;
    root /var/www/html/yourdomain.com;
    index index.php index.html index.htm;

    location / {
        try_files $uri $uri/ /index.php?$args;
    }

    location ~ \.php$ {
        include snippets/fastcgi-php.conf;
        fastcgi_pass unix:/var/run/php/php8.2-fpm.sock;
        fastcgi_param SCRIPT_FILENAME $document_root$fastcgi_script_name;
        include fastcgi_params;
    }
    # Optional: Deny access to .htaccess files and other hidden files
    location ~ /\. {
        deny all;
    }
}
# --- End Nginx config ---
sudo ln -s /etc/nginx/sites-available/yourdomain.com /etc/nginx/sites-enabled/
sudo nginx -t && sudo systemctl reload nginx

# Download and install WP-CLI (if not already done)
curl -O https://raw.githubusercontent.com/wp-cli/builds/gh-pages/phar/wp-cli.phar
chmod +x wp-cli.phar
sudo mv wp-cli.phar /usr/local/bin/wp
Ensure your web server is configured with a server block or virtual host for your domain, pointing to the intended WordPress root directory (e.g., /var/www/html/yourdomain.com). It's crucial not to activate this configuration with your public domain yet. Instead, you'll use a temporary domain, the server's IP address, or local hosts file modifications for private testing.
Step-by-Step Migration Process with Minimal Interruption
This phased approach minimizes the window of downtime by preparing the new environment fully before making the final switch. Follow these steps carefully to migrate your WordPress site with near-zero disruption.
- Prepare the New Server and Database:
On your new server, begin by creating a new MySQL/MariaDB database and a dedicated database user with robust permissions specifically for your WordPress site. This isolates your WordPress database from other potential applications on the server. For example, using the MariaDB client after installation:
sudo mysql -u root -p
CREATE DATABASE new_wordpress_db CHARACTER SET utf8mb4 COLLATE utf8mb4_unicode_ci;
CREATE USER 'new_wp_user'@'localhost' IDENTIFIED BY 'YourStrongPassword_2026!';
GRANT ALL PRIVILEGES ON new_wordpress_db.* TO 'new_wp_user'@'localhost';
FLUSH PRIVILEGES;
EXIT;
Ensure your web server (Nginx or Apache) is configured with a server block/virtual host for your domain, pointing to the future WordPress root directory (e.g.,
/var/www/html/yourdomain.com). Verify that PHP-FPM (for Nginx) or PHP modules (for Apache) are correctly linked and listening on the appropriate socket or port. Confirm that port 80 (HTTP) and potentially 443 (HTTPS) are open on your server's firewall (e.g., UFW orfirewalld) for public access later. - Copy WordPress Files and Initial Database Sync:
Use
rsyncto copy all WordPress files from the old server to the new server.rsyncis highly efficient because it only transfers differences between files, which is crucial for subsequent incremental synchronizations. Remember to exclude cache directories and any old backup plugin directories to prevent transferring unnecessary or problematic files.# On the OLD server, synchronize files to the NEW server's /var/www/html/yourdomain.com/ directory # Ensure SSH keys are set up for passwordless login between servers for automation rsync -azP --delete --exclude="wp-content/cache/" --exclude="wp-content/plugins/your-backup-plugin/" /var/www/html/yourdomain.com/ user@new_server_ip:/var/www/html/yourdomain.com/Next, export the database from the old server and import it into the new server's database. This step establishes the initial data on the new server. For WordPress sites,
mysqldumpis a standard tool, but you can also usewp db exportandwp db importif WP-CLI is already set up on both servers.# On the OLD server, export database mysqldump -u old_db_user -p old_db_name > initial_db_sync.sql # Securely transfer initial_db_sync.sql to the NEW server, e.g., using scp scp initial_db_sync.sql user@new_server_ip:/tmp/ # On the NEW server, import database mysql -u new_wp_user -p new_wordpress_db < /tmp/initial_db_sync.sql - Configure WordPress on the New Server:
On the new server, modify the
wp-config.phpfile within your WordPress root directory to point to the new database name, username, password, and host. If your domain name is changing or you are moving from HTTP to HTTPS, you must update the site URLs in the database. WP-CLI'ssearch-replacecommand is the safest and most reliable method for this, as it handles serialized data correctly, unlike direct SQL queries.# Example wp-config.php content (ensure correct database credentials) define('DB_NAME', 'new_wordpress_db'); define('DB_USER', 'new_wp_user'); define('DB_PASSWORD', 'YourStrongPassword_2026!'); define('DB_HOST', 'localhost'); // Or your database server IP if remote # Update site URLs if necessary (on the NEW server, from the WordPress root directory) # First, a dry run to see what changes will be made: wp search-replace 'https://olddomain.com' 'https://yournewdomain.com' --all-tables --precise --dry-run # Then, execute the changes: wp search-replace 'https://olddomain.com' 'https://yournewdomain.com' --all-tables --preciseThe
--dry-runoption is essential for previewing changes before committing them, preventing accidental data corruption. This step is critical for ensuring all internal links, image paths, and references within the database correctly point to the new domain on the new server. Refer to the WP-CLI search-replace documentation for detailed usage, including options for handling specific tables or columns. - Test the New Site Privately:
Before exposing the new site to public traffic, test it thoroughly to ensure everything functions as expected. The most common method for private testing is to modify your local computer's
hostsfile. This file allows you to temporarily map your domain name to the new server's IP address, overriding public DNS resolution. This lets you browse the new site locally as if DNS had already propagated, without affecting public visitors.# Example entry for your local /etc/hosts (Linux/macOS) or C:\Windows\System32\drivers\etc\hosts (Windows) # Replace 192.0.2.100 with your new server's public IP address 192.0.2.100 yourdomain.com www.yourdomain.comAfter editing your
hostsfile, open your browser and navigate to your domain. Verify all pages, posts, images, forms, and dynamic functionalities. Check the WordPress admin panel, test plugin integrations (e.g., contact forms, e-commerce carts), and ensure SSL certificates are properly installed and working (if you've already configured them). Use browser developer tools to check for broken links, console errors, or mixed content warnings. This private testing phase is crucial for identifying and fixing any issues before going live, such as incorrect paths or missing assets. - Perform the Final Sync and DNS Switchover:
During a low-traffic period (e.g., late night), briefly enable a maintenance mode plugin on your OLD site, or use server-level redirects (e.g., Nginx
return 503;or ApacheRewriteRule .* - [R=503,L]), to prevent new data from being written. This minimizes data discrepancy between the final synchronizations. Immediately perform a finalrsyncfor any file changes and a finalmysqldump/import for the database to capture all updates made since the initial sync. This is the shortest possible window where the old site is effectively "frozen."Crucially, update your domain's A records (and AAAA records for IPv6 if applicable) at your DNS registrar or provider to point to the new server's public IP address. As mentioned earlier, setting a low TTL (e.g., 300 seconds or 5 minutes) a day or two before the migration is vital; this ensures that DNS changes propagate faster across the internet. After the switch, you can revert to a higher TTL (e.g., 3600 seconds or 1 hour) for better caching performance. Understanding fundamental DNS concepts, including TTL, is detailed in RFC 1034 for DNS, which provides foundational knowledge for this step.
- Post-Migration Verification:
Once DNS propagation begins, actively monitor access logs on both the old and new servers (e.g.,
tail -f /var/log/nginx/access.log) to confirm traffic is successfully shifting to the new environment. Clear all caches: browser cache, server-side caches (e.g., Nginx FastCGI cache, Redis), and any WordPress caching plugins (e.g., WP Super Cache, LiteSpeed Cache). Verify permalinks are working correctly by visiting a few different post types and categories; sometimes, simply going to Settings > Permalinks in WordPress admin and clicking "Save Changes" can resolve issues. Install and configure your SSL certificate (e.g., Let's Encrypt with Certbot) on the new server if not already done, ensuring all traffic is secured via HTTPS. Ensure all forms, comments, e-commerce functionalities, and dynamic elements operate as expected. Finally, deactivate and remove the maintenance mode plugin from the new site.
Advanced Strategies for Large or High-Traffic WordPress Sites
For WordPress installations handling hundreds of thousands or millions of monthly visitors, the zero-downtime requirement becomes even more stringent, necessitating more sophisticated techniques beyond simple DNS switching. These strategies focus on minimizing data inconsistencies, ensuring continuous availability, and providing immediate failover capabilities during the cutover.
Database Replication and Proxying
For truly zero-downtime database migration, especially with high-volume writes, real-time database replication is essential. Solutions like MySQL Replication or MariaDB Galera Cluster can maintain data consistency between the old and new databases by asynchronously or synchronously copying changes. During migration, the new server can initially act as a replica of the old database. Once the new server is fully synchronized and validated, traffic can be directed to it, and it can then become the primary database server. Database proxying, using tools like ProxySQL 2.5.x (released early 2026) or HAProxy, can also help route traffic intelligently to ensure writes always go to the active primary database, regardless of which web server is currently serving requests. This prevents split-brain scenarios where data might be written to an old, non-primary database.
Implementing database replication requires a deeper understanding of database administration and server configurations, often suitable for sites managed on a VPS or dedicated server where you have full control over the MySQL/MariaDB environment. It allows for a gradual, controlled failover rather than an abrupt switch, providing a robust mechanism for maintaining data integrity during high-stakes migrations.
CDN and Load Balancers
Content Delivery Networks (CDNs) like Cloudflare, Akamai, or Fastly already cache static assets (images, CSS, JavaScript) and can absorb much of the traffic during a DNS switch. By pointing your domain to a CDN, and then updating the CDN's origin server IP to the new server's address, the change propagates almost instantly within the CDN network itself, often masking DNS propagation delays. For dynamic content and ultimate control over traffic routing, a load balancer (e.g., Nginx, HAProxy 2.8.x as of 2026-04, or a cloud provider's managed load balancer like AWS ELB) can sit in front of both the old and new web servers. During migration, you can gradually shift traffic from the old server to the new one (a process called "canary deployment" or "blue/green deployment"), ensuring a smooth transition. This allows for A/B testing the new environment with a small percentage of users before a full cutover, as described in Nginx's guide to load balancing.
Using a CDN is also beneficial for overall WordPress performance, reducing the load on your origin server, improving global content delivery speeds, and providing an additional layer of security. Consider integrating Redis Object Cache for WordPress on your new server to further optimize database query performance and reduce database load, especially when dealing with high traffic.
Common Pitfalls and Troubleshooting During Migration
Even with meticulous planning, issues can arise during a WordPress migration. Knowing common problems and their solutions saves significant time and stress, ensuring a quicker resolution and minimal impact on user experience.
DNS Propagation Issues
Symptom: After updating DNS records, some users see the old site, while others see the new site, or neither. You might encounter "DNS_PROBE_FINISHED_NXDOMAIN" errors, indicating the domain name can't be resolved.
Cause: DNS caching by ISPs, corporate networks, and local machines. Lowering the TTL (Time-To-Live) value for your A/AAAA records before the migration helps, but global propagation still takes time, sometimes up to 48 hours for stubborn caches.
Fix: Use online DNS checkers (e.g., DNS Checker, whatsmydns.net) to monitor the propagation status across different resolvers globally. Force refresh your local DNS cache (ipconfig /flushdns on Windows, sudo killall -HUP mDNSResponder on macOS/Linux). Be patient, as some resolvers take longer. Double-check your A and AAAA records are absolutely correct at your domain registrar or DNS provider. If traffic is split, ensure both old and new servers are serving the most up-to-date content or a maintenance page.
Database Connection Errors
Symptom: "Error establishing a database connection" message prominently displayed on the WordPress front-end and admin area. This is a critical error preventing WordPress from loading any content.
Cause: Incorrect database credentials (name, user, password, host) in wp-config.php, the MySQL/MariaDB service not running on the new server, or a firewall blocking the database port (default 3306).
Fix: Carefully verify DB_NAME, DB_USER, DB_PASSWORD, and DB_HOST constants in your wp-config.php file on the new server. Ensure the MySQL/MariaDB service is active and running (sudo systemctl status mariadb or sudo systemctl status mysql). Check your server's firewall rules (e.g., sudo ufw status or sudo firewall-cmd --list-all) to ensure the web server can connect to the database locally or remotely. If the database is on a separate server, ensure network connectivity between the web server and database server.
Permalinks and Broken Links
Symptom: Pages returning 404 "Not Found" errors, especially for non-root URLs (e.g., yourdomain.com/blog/my-post works, but yourdomain.com/my-post doesn't). Images or internal links appear broken, often showing a "broken image" icon or leading to incorrect URLs.
Cause: Web server rewrite rules (.htaccess for Apache, Nginx configuration) not correctly configured for WordPress's permalink structure, or the site URL in the database was not correctly updated during migration.
Fix: In the WordPress admin panel, navigate to Settings > Permalinks. Simply re-select your preferred permalink structure and click "Save Changes" without making any modifications. This action regenerates the necessary rewrite rules for your web server. For Nginx, ensure your server block includes the standard WordPress try_files $uri $uri/ /index.php?$args; directive. If wp search-replace was missed or executed incorrectly, re-run it with the correct old and new URLs. For Apache, verify the mod_rewrite module is enabled (sudo a2enmod rewrite) and that AllowOverride All is set for your WordPress directory in your virtual host configuration.
SSL Certificate Problems
Symptom: Browser warnings like "Your connection is not private," "NET::ERR_CERT_COMMON_NAME_INVALID," or "Mixed Content" errors (some assets loading over insecure HTTP instead of HTTPS), leading to a broken padlock icon in the address bar.
Cause: An SSL certificate is either not installed, incorrectly configured on the new server, or WordPress's site URL settings have not been fully updated to use HTTPS.
Fix: Install a valid SSL certificate (e.g., using Certbot for free Let's Encrypt certificates) on the new server and ensure your web server is configured to use it correctly. Verify your WordPress "WordPress Address (URL)" and "Site Address (URL)" in Settings > General are both set to use https://. If you have hardcoded HTTP URLs within your content, use a plugin like "Really Simple SSL" to enforce HTTPS and fix mixed content issues, or manually update them in your database using WP-CLI's search-replace command for greater control. For more detailed server hardening, including firewall configurations and SSL setup, consult our Ubuntu 24.04 VPS Hardening Checklist for Initial Server Setup.